In the oil and gas industry, safety is paramount, especially when dealing with environments where flammable gases, vapors, or dust can create explosive atmospheres. This is where ATEX, or “Atmosphères Explosibles,” comes into play. ATEX is a European Union directive that defines the necessary safety standards for equipment and protective systems intended for use in explosive atmospheres.
Understanding ATEX Zones
The concept of ATEX zones helps to classify hazardous areas based on the frequency and duration of the presence of explosive atmospheres:
- Zone 0: An area where an explosive atmosphere consisting of a mixture of air and flammable substances in the form of gas, vapor, or mist is present continuously or for long periods.
- Zone 1: An area where an explosive atmosphere is likely to occur in normal operation occasionally.
- Zone 2: An area where an explosive atmosphere is not likely to occur in normal operation but, if it does occur, will persist for a short period.
Why is ATEX Important in the Oil & Gas Industry?
In the oil and gas industry, the risk of explosions due to flammable gases, vapors, and dust is high. ATEX certification ensures that equipment used in these environments is designed to prevent ignition and minimize the risk of explosions. By adhering to ATEX standards, companies can:
- Ensure Safety: Protect workers and assets from the dangers of explosions.
- Comply with Regulations: Meet legal requirements for equipment used in hazardous areas.
- Enhance Reliability: Use robust equipment that performs reliably even in harsh conditions.
How to Make ATEX-Proof Cameras and Systems
Creating ATEX-proof cameras and systems involves several critical steps to ensure they meet the stringent requirements for use in explosive atmospheres:
- Material Selection:
- Use non-sparking materials such as stainless steel or aluminum for the camera housing.
- Opt for materials that can withstand extreme temperatures and are resistant to corrosion.
- Sealing and Encapsulation:
- Ensure all electronic components are sealed within the camera to prevent any contact with the explosive atmosphere.
- Use explosion-proof enclosures that are hermetically sealed to prevent gas or dust ingress.
- Intrinsic Safety Design:
- Design circuits with low energy levels, ensuring they are incapable of causing ignition.
- Implement current limiting and protective devices to prevent overheating or short circuits.
- Testing and Certification:
- Subject the cameras and systems to rigorous testing under ATEX guidelines.
- Obtain certification from an authorized ATEX certification body to validate that the equipment meets the necessary safety standards.
- Maintenance and Inspection:
- Regularly inspect ATEX-certified cameras and systems to ensure they remain in compliance.
- Perform maintenance using ATEX-certified tools and procedures to avoid compromising the equipment’s safety.

The Benefits of Using ATEX-Proof Cameras and Systems in Oil & Gas
- Enhanced Safety: ATEX-proof cameras reduce the risk of explosions, providing real-time monitoring in hazardous areas without endangering personnel.
- Operational Efficiency: With ATEX-certified equipment, companies can operate in hazardous areas with confidence, minimizing downtime due to safety concerns.
- Regulatory Compliance: Using ATEX-certified cameras and systems ensures compliance with legal safety requirements, avoiding penalties and enhancing the company’s reputation.
- Data Integrity: These systems can provide reliable data even in the most challenging environments, essential for monitoring and decision-making processes.
Stepwise Process to Operate an ATEX-Proof Camera
Operating an ATEX-proof camera involves careful handling to ensure safety and functionality, particularly in hazardous environments. Below is a step-by-step guide to turning on an ATEX-proof camera with the specified configuration:
Step 1: Preparation
- Ensure Safety: Before beginning, confirm that the area is safe for operation and that all personnel are aware of the procedures.
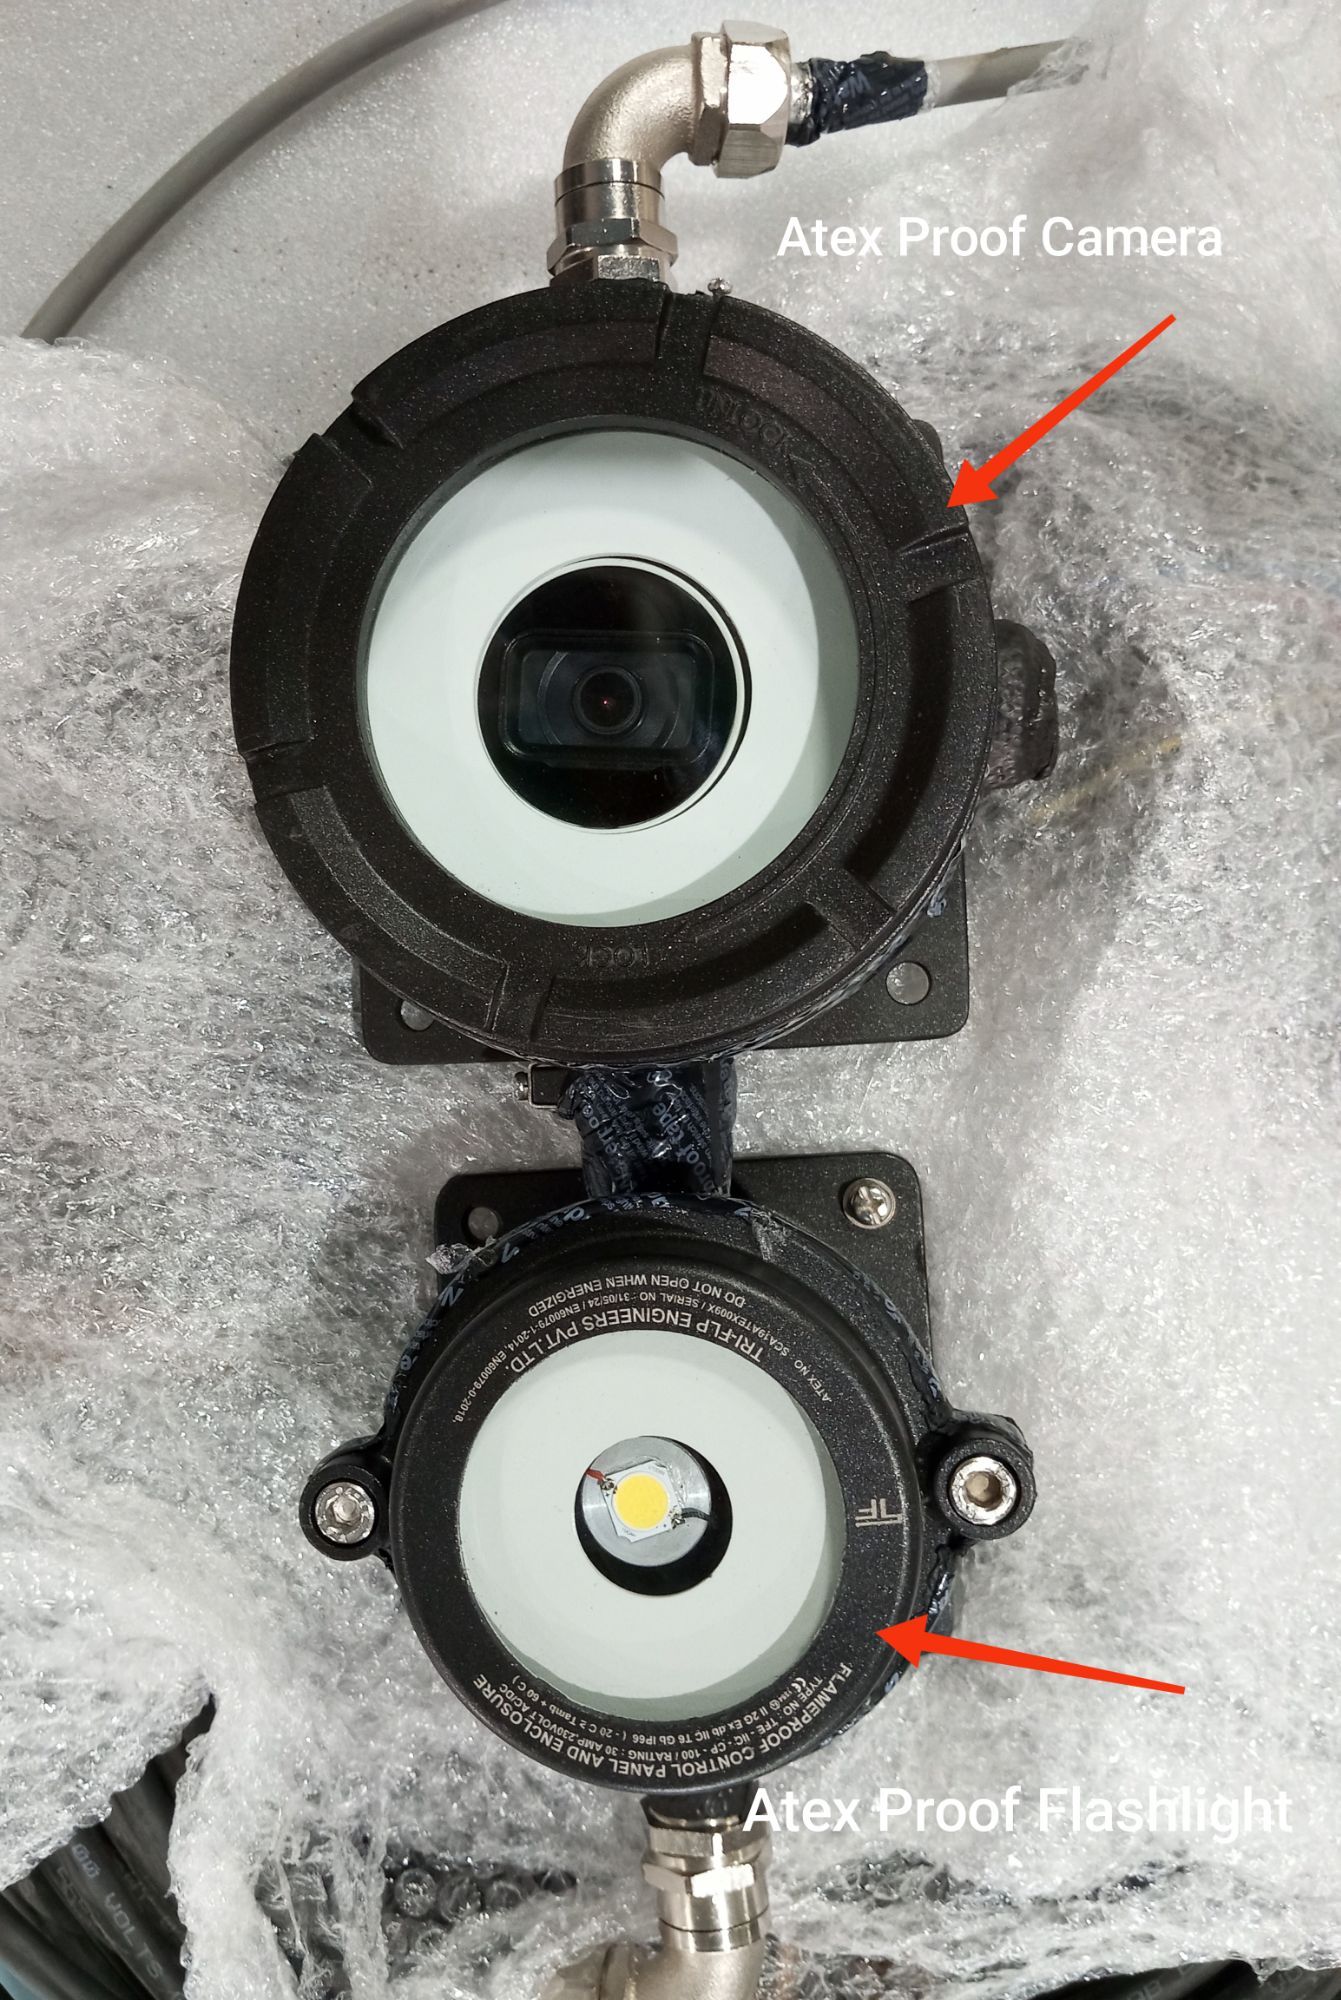
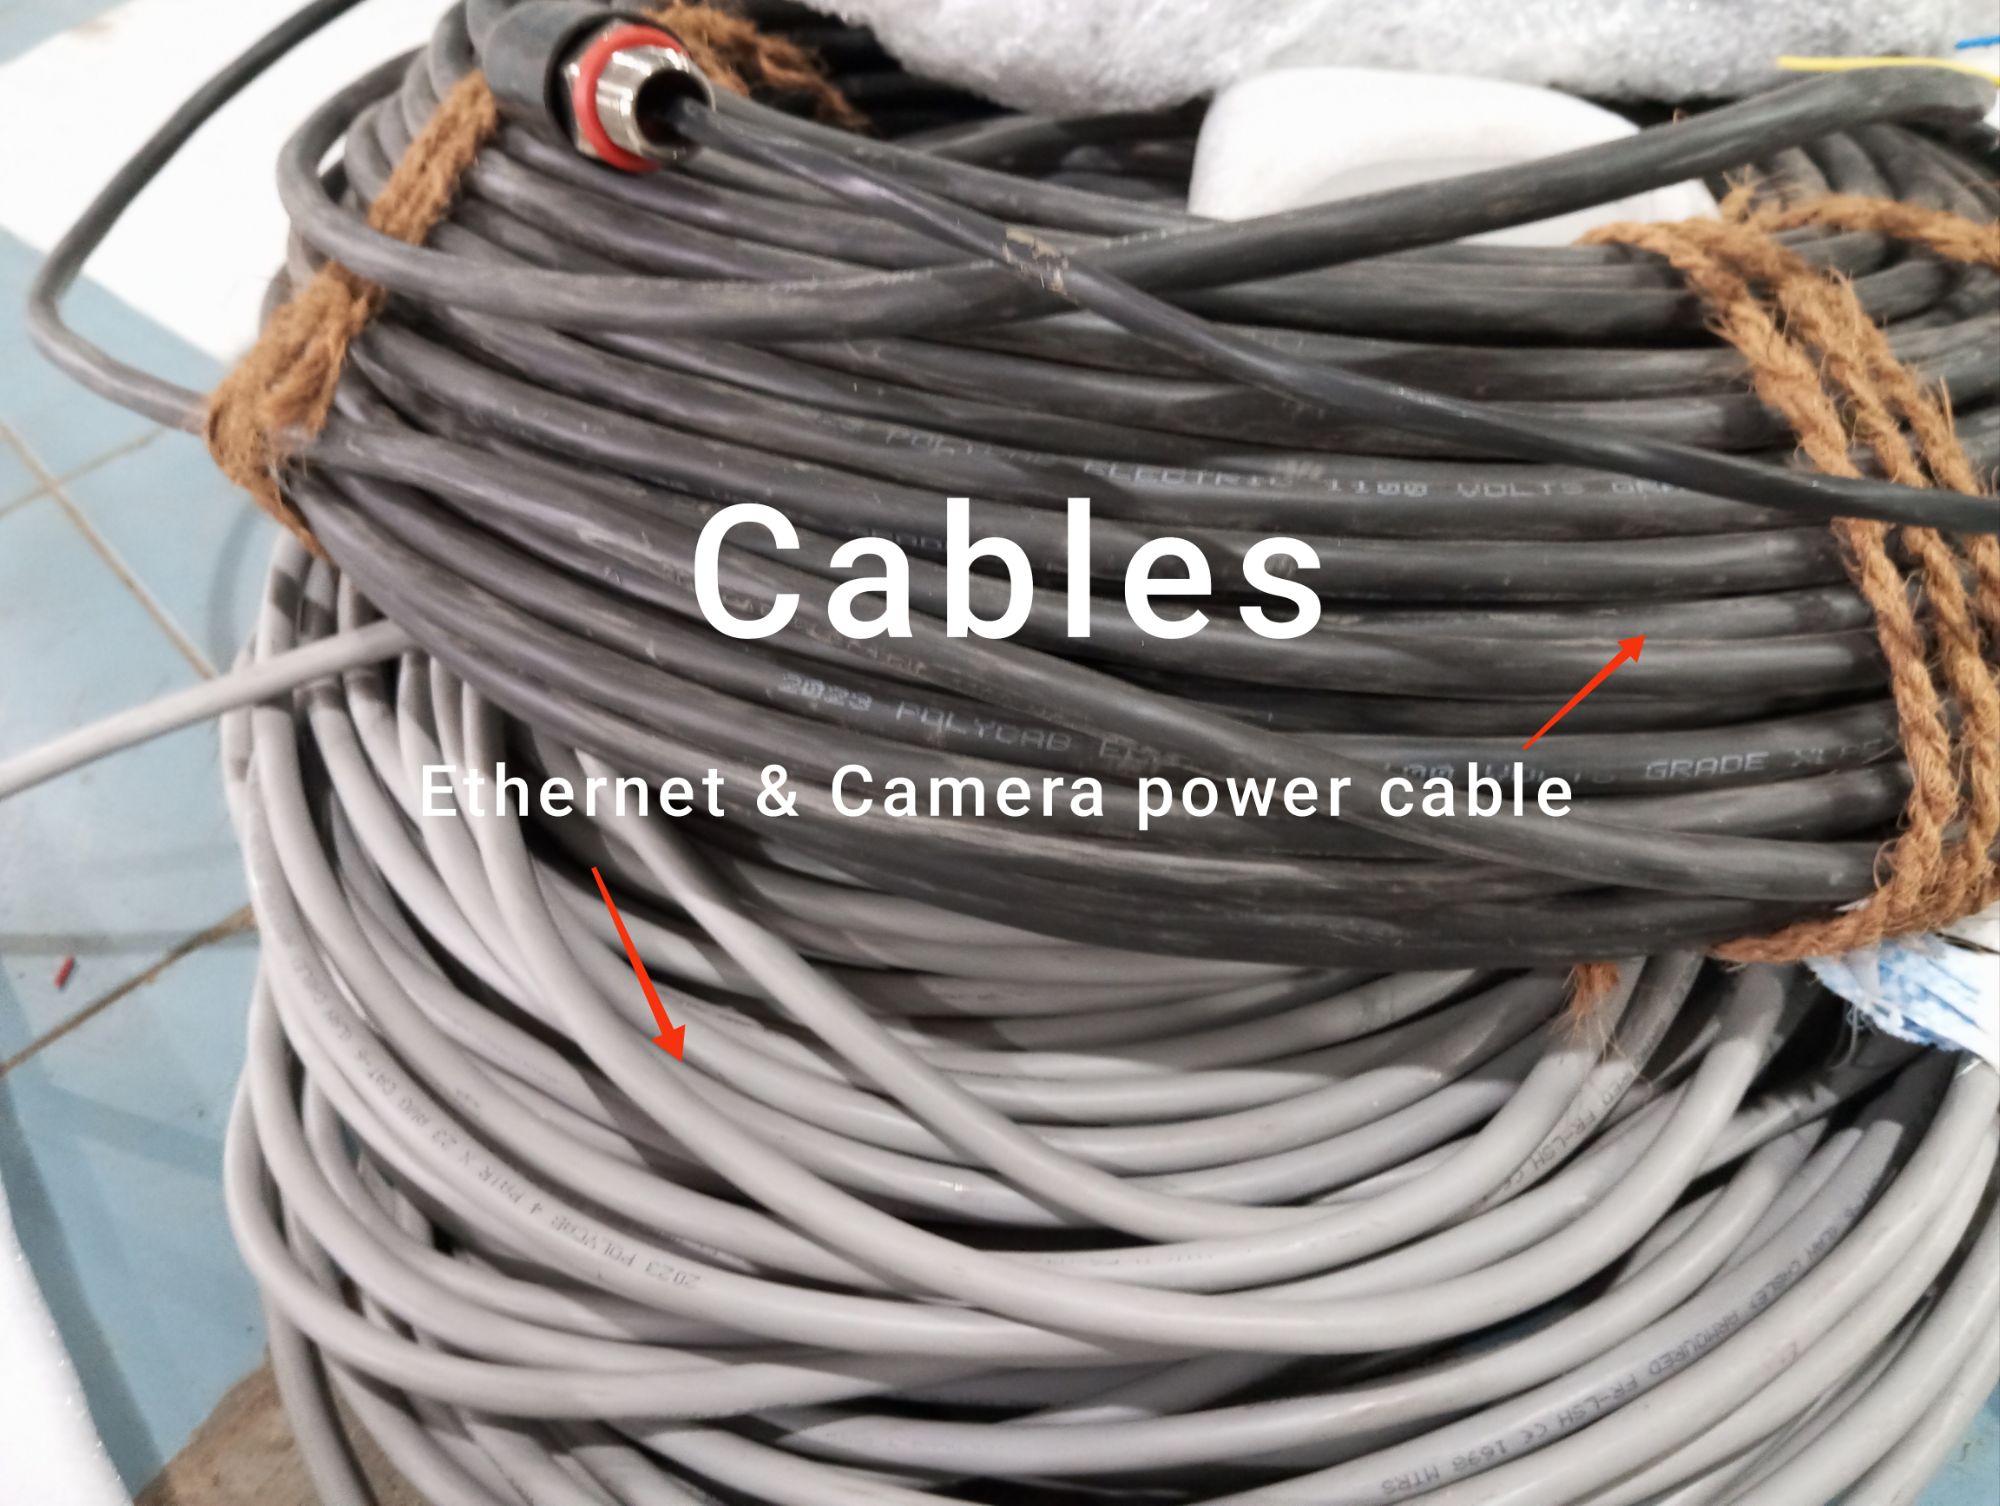
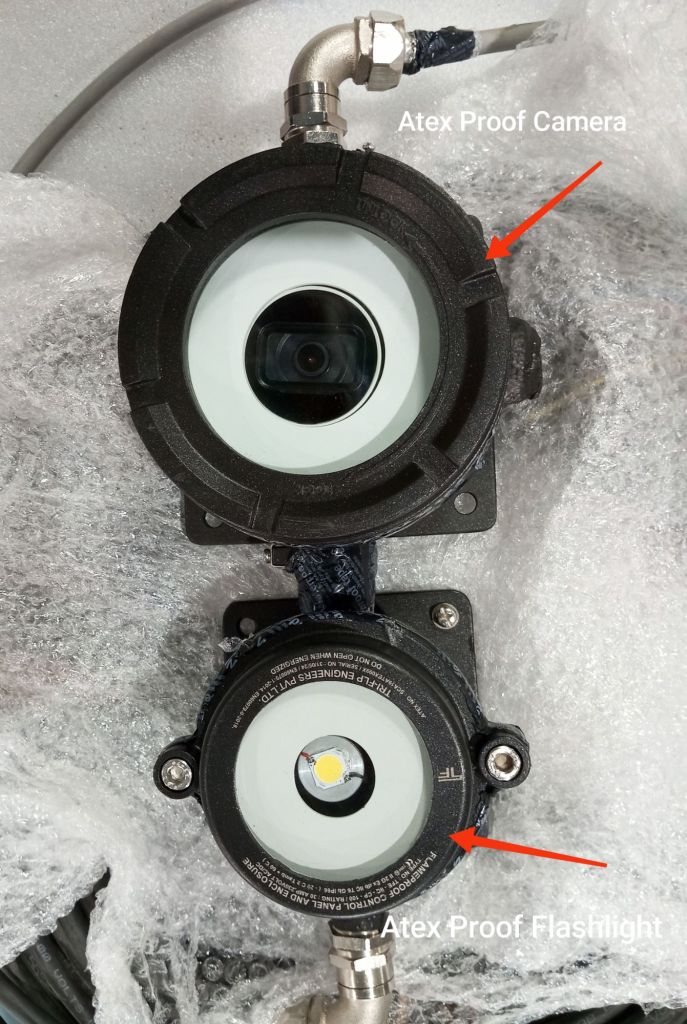
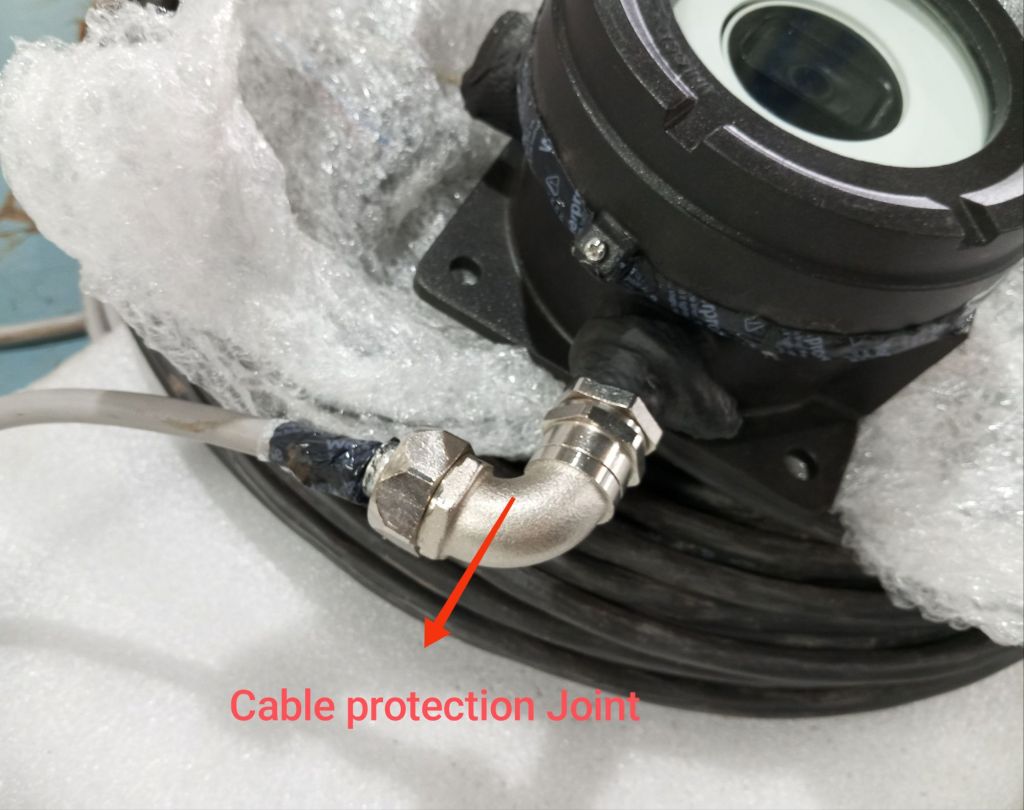
- Inspect Equipment: Check that the camera, flashlight, power supply cables, and RJ45 connector are intact, with no visible damage to the ATEX-proof glands or cables.
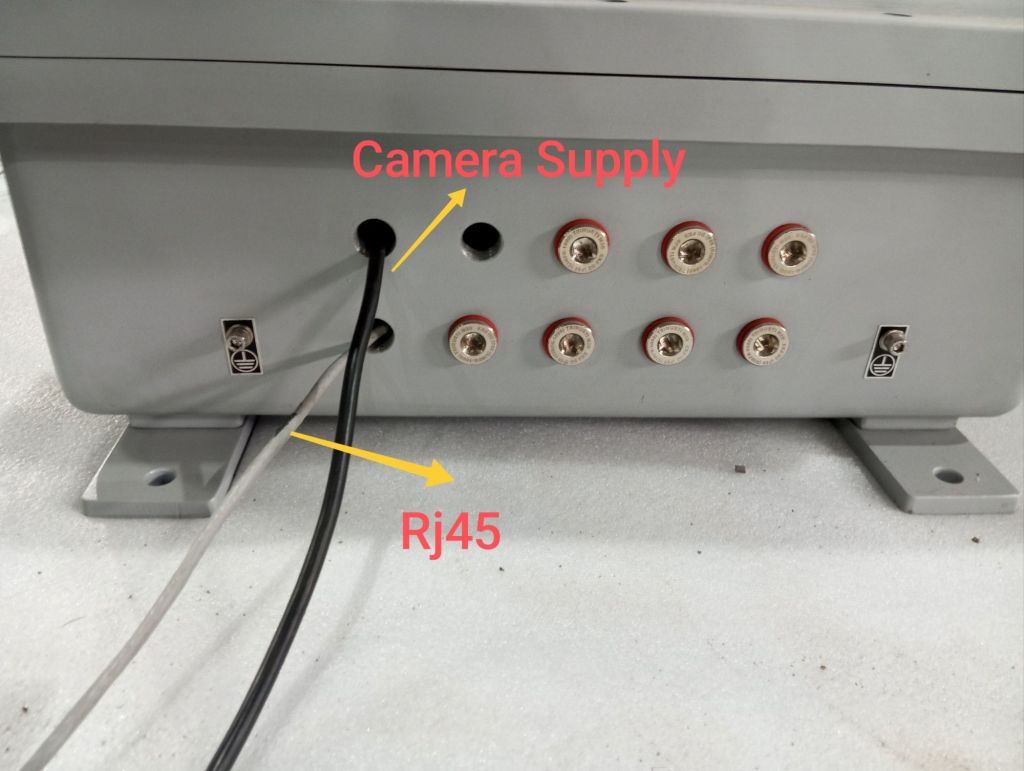
Step 2: Power Supply Connection
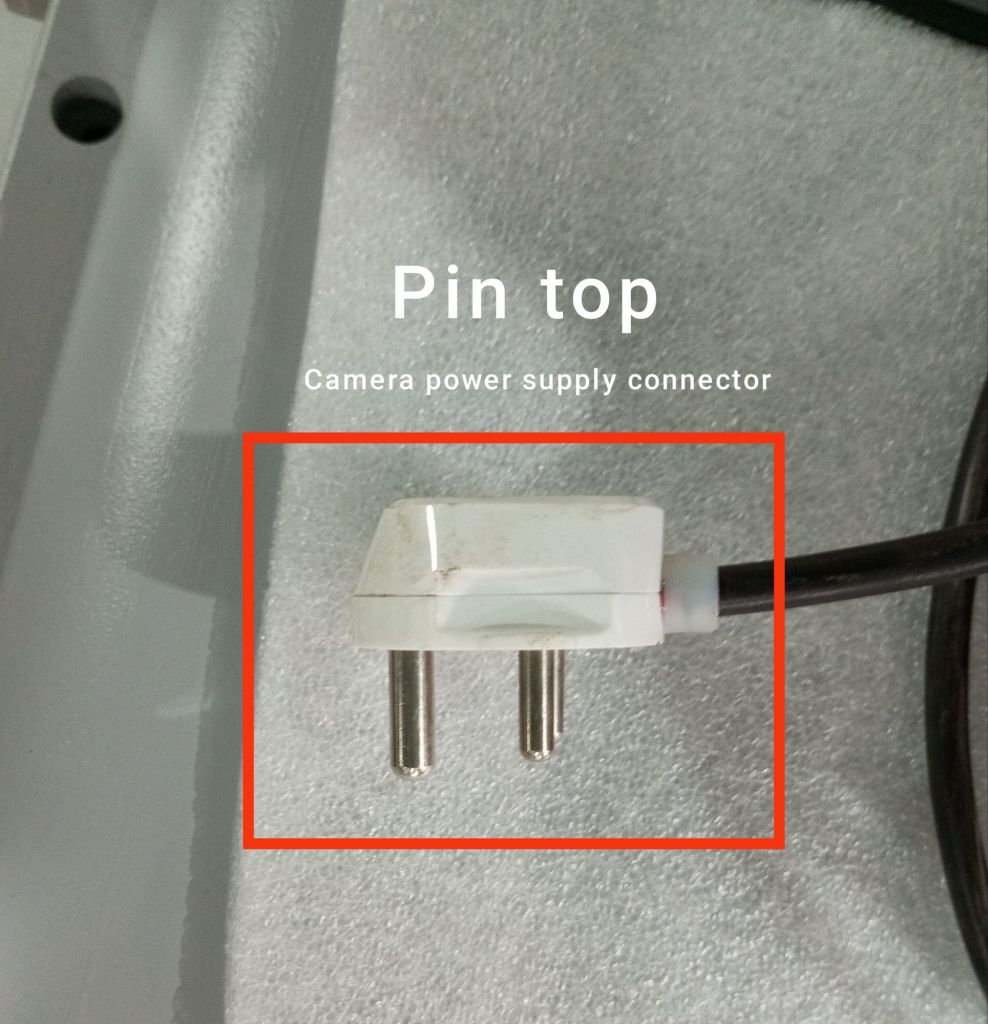
- Locate the Power Supply Cable for the Camera:
- Identify the power supply cable designated for the camera, which should have an ATEX-proof gland attached.
- Connect the Camera Power Supply:
- Insert the power supply cable into the designated power input port on the camera.
- Ensure the connection is secure and that the ATEX-proof gland is properly fastened to maintain the explosion-proof seal.
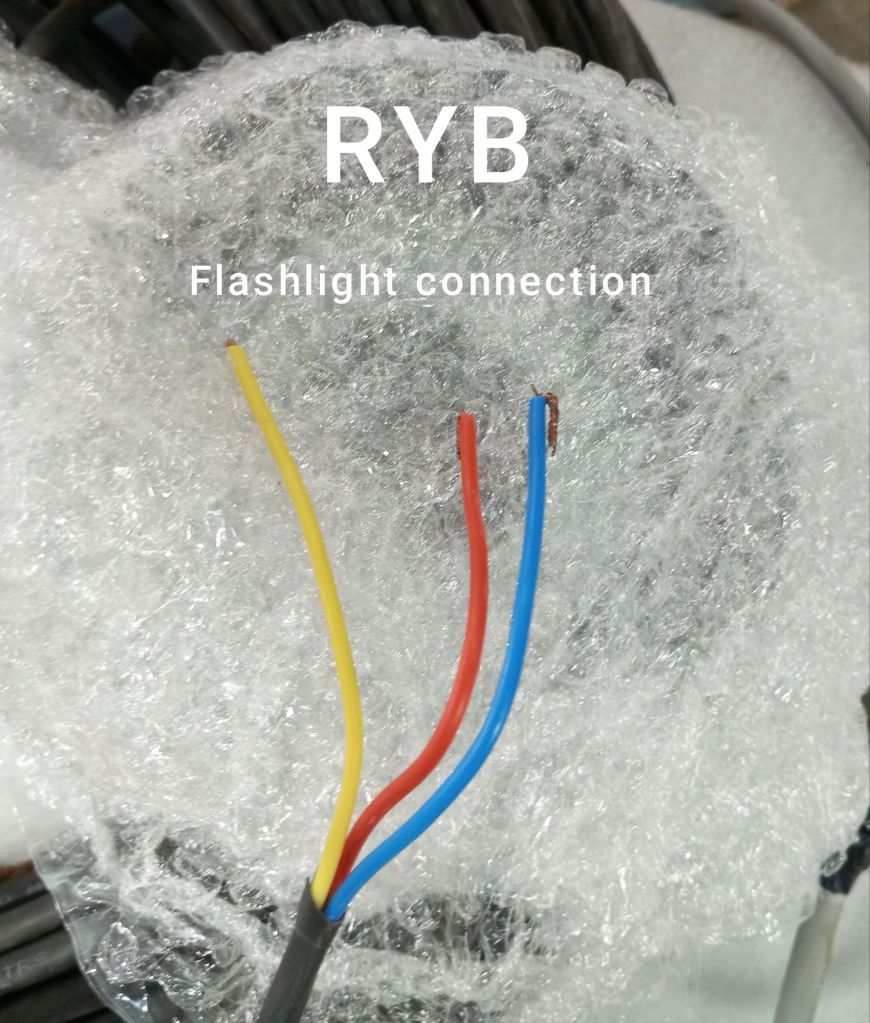
- Locate the Power Supply Cable for the Flashlight:
- Identify the separate power supply cable for the flashlight, also equipped with an ATEX-proof gland.
- Connect the Flashlight Power Supply:
- Plug the flashlight’s power supply cable into its corresponding power input port.
- Secure the connection, ensuring that the ATEX-proof gland is properly attached.
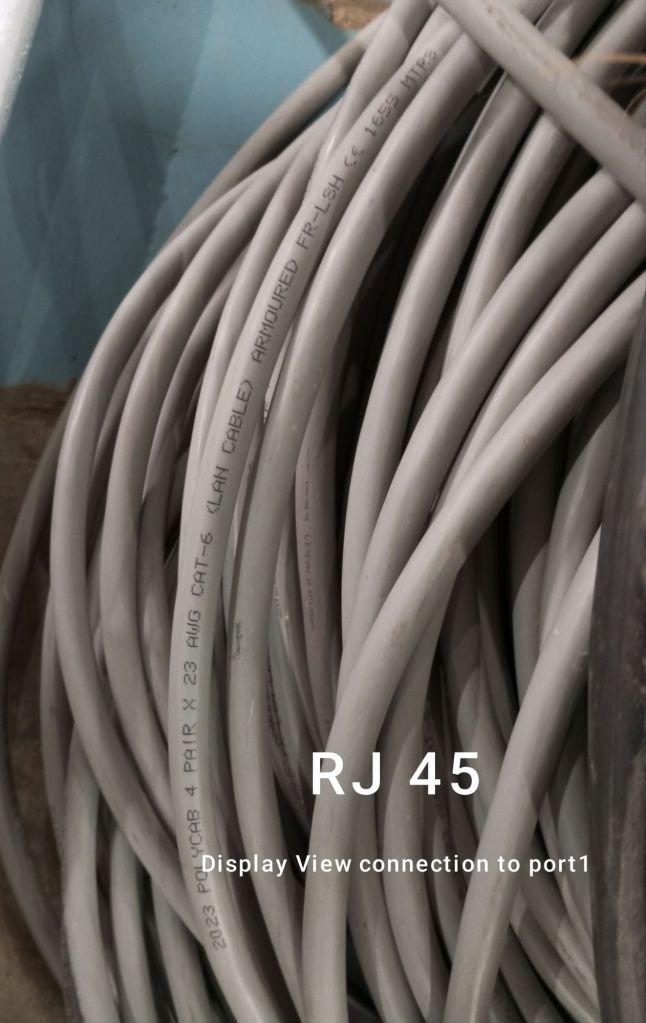
Step 3: Display Connection via RJ45
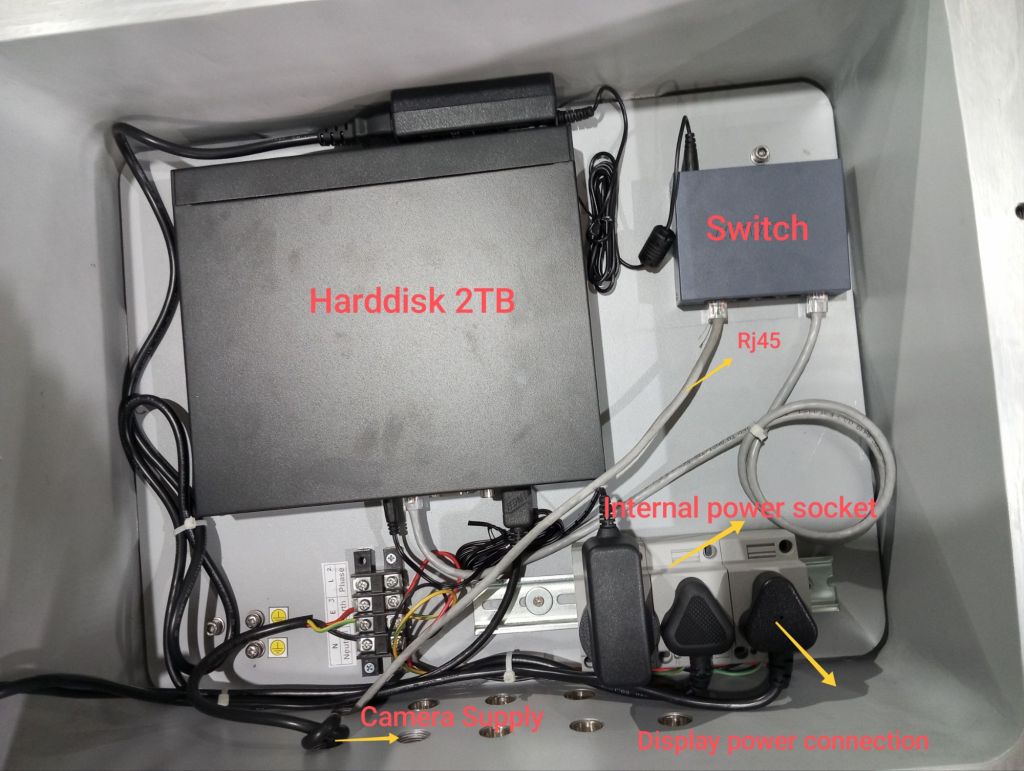
- Prepare the RJ45 Connector:
- Locate the RJ45 connector for the camera’s display view, which should be ATEX-certified and equipped with an explosion-proof gland.
- Connect the RJ45 Cable:
- Insert the RJ45 connector into the camera’s Ethernet port.
- Make sure the gland is securely fastened to maintain the integrity of the explosion-proof system.
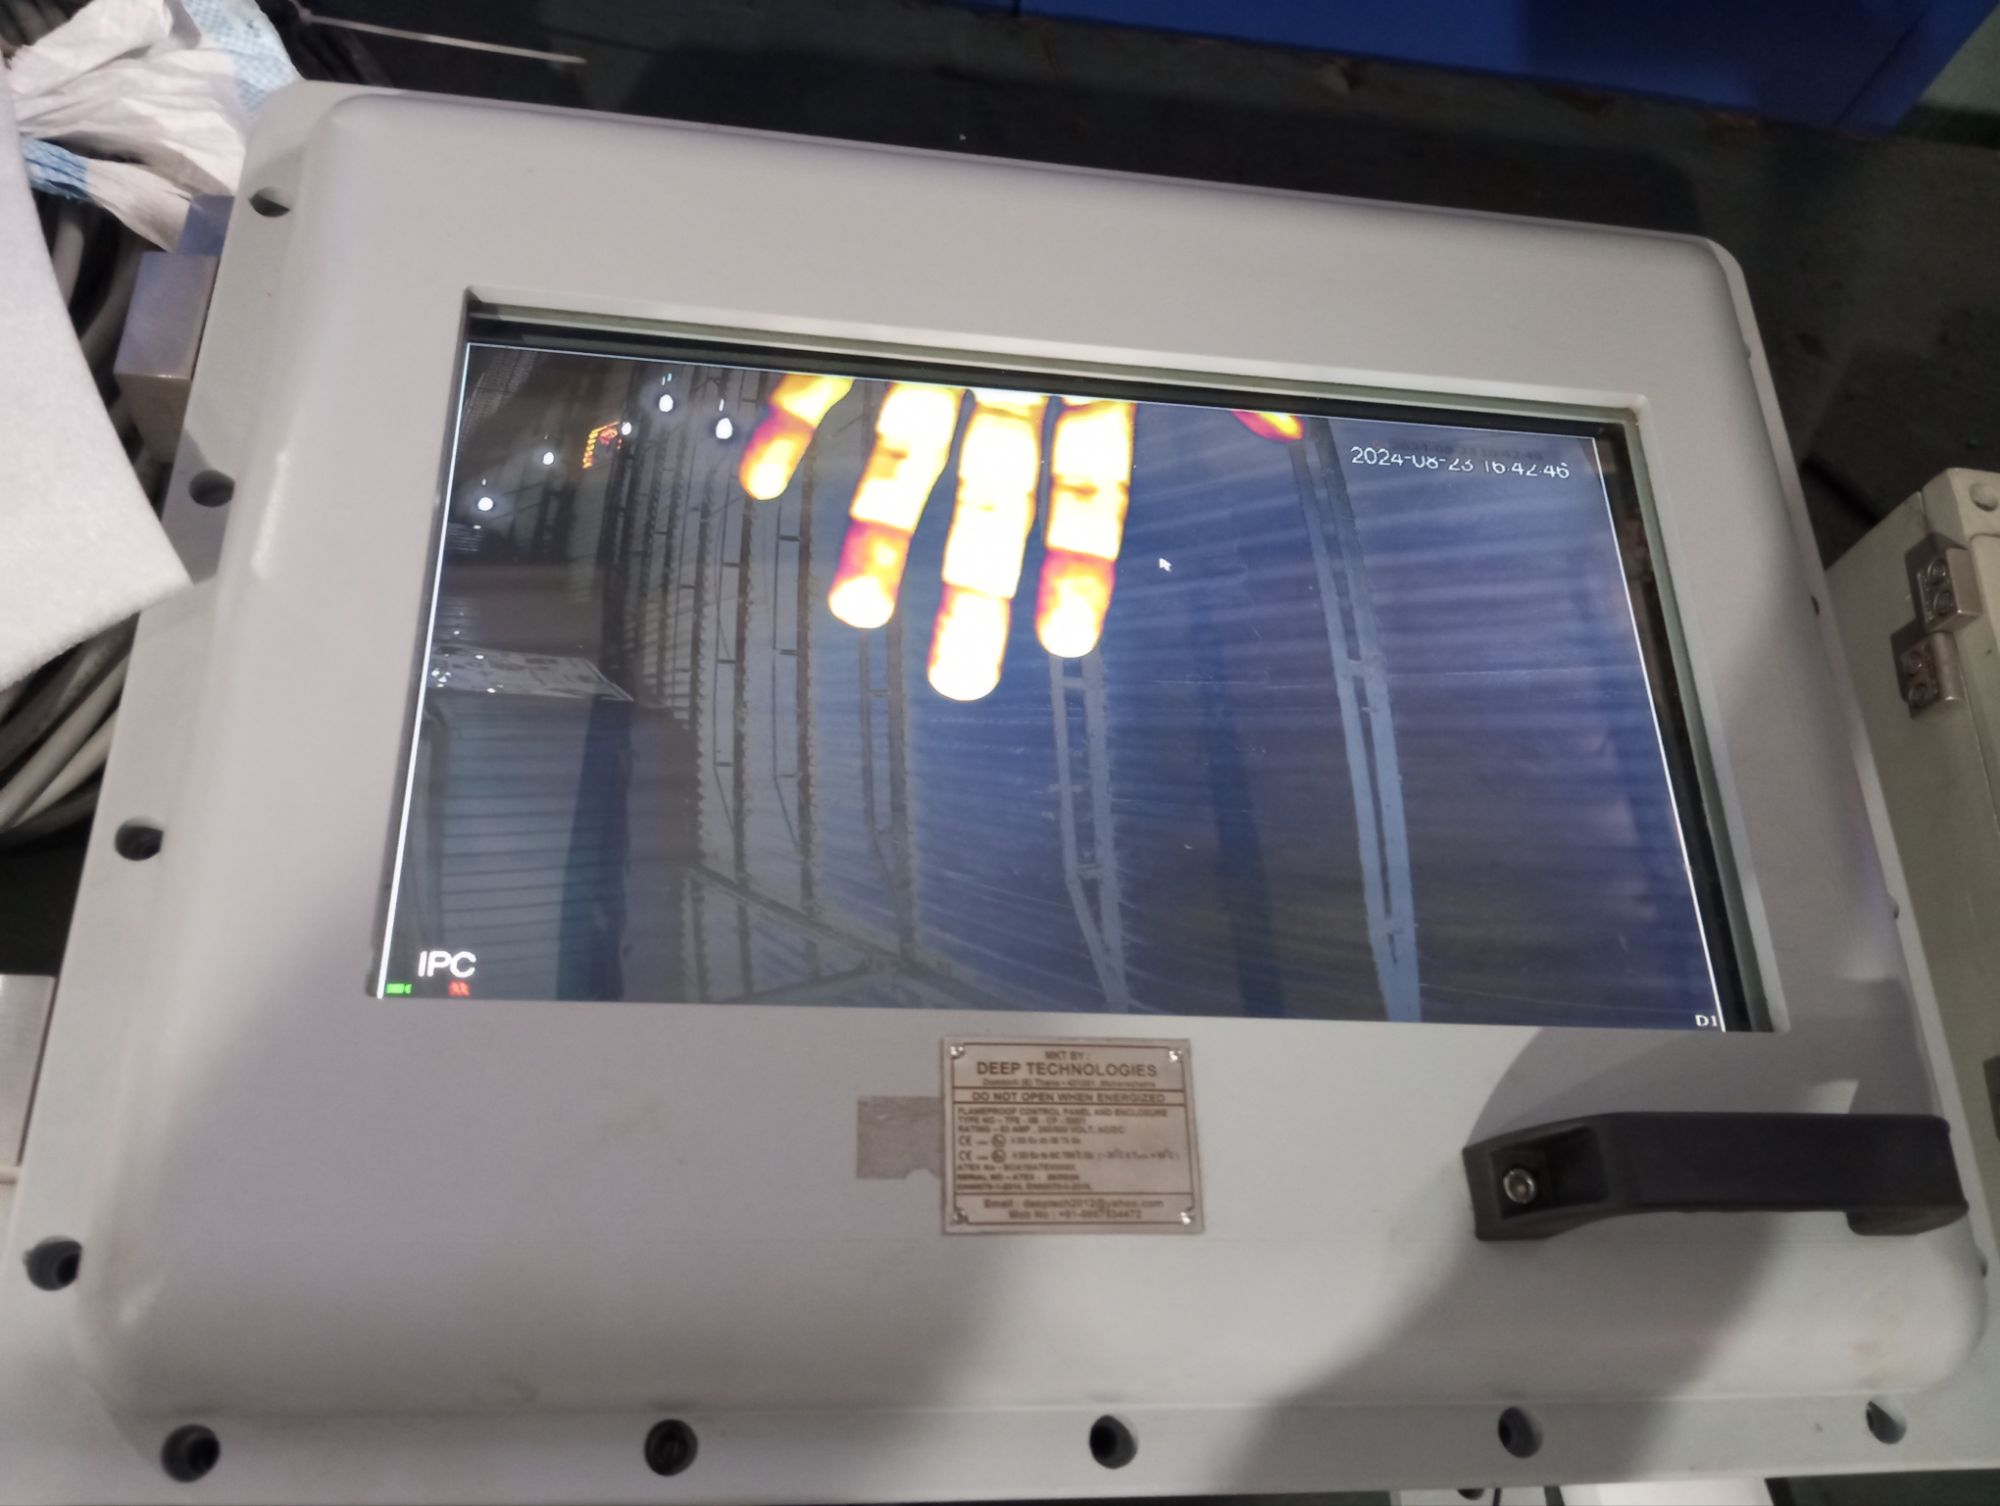
- Connect to Display Device:
- Connect the other end of the RJ45 cable to the display device (e.g., a monitor or a network device).
- Ensure that this connection is also secured and, if applicable, confirm that the display device is ATEX-certified.
Step 4: Power On the Camera and Flashlight
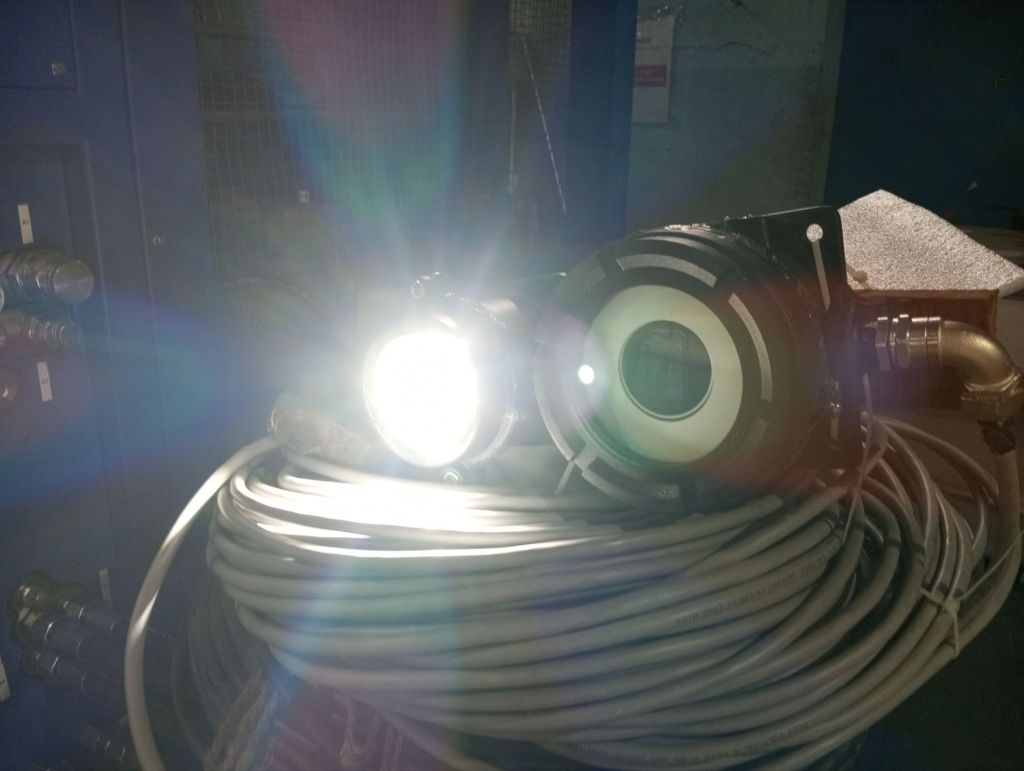
- Power On the Camera:
- Once all connections are secure, turn on the power supply for the camera.
- Verify that the camera powers up correctly, and check the display for a live video feed.
- Power On the Flashlight:
- Activate the power supply for the flashlight.
- Ensure that the flashlight illuminates as expected, and check that both the camera and the flashlight are functioning together.
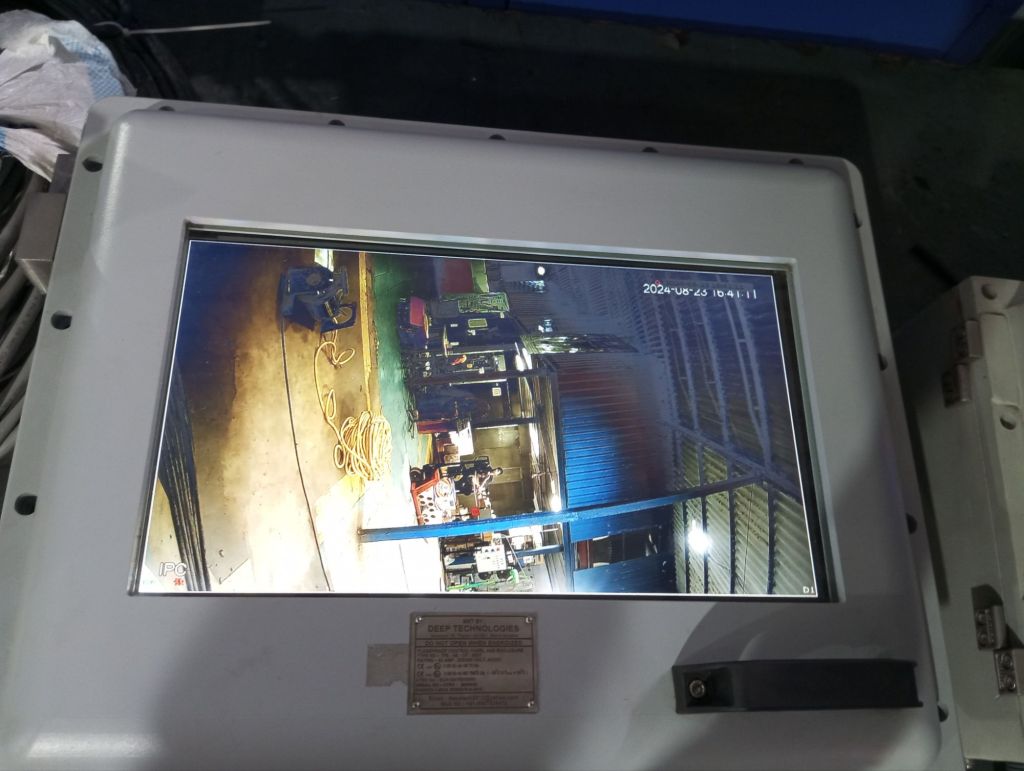
Step 5: Operational Check

- Verify Video Feed:
- Check the video feed on the connected display device to ensure that the camera is capturing and transmitting images correctly.
- Adjust Settings (if applicable):
- Adjust the camera’s focus, zoom, or other settings via the display device to optimize the view, if the camera allows for such adjustments.
- Monitor Flashlight Operation:
- Ensure the flashlight provides sufficient illumination for the camera’s operation in low-light or dark environments.
Step 6: Secure and Monitor
- Ensure All Connections Are Secure:
- Double-check all connections, ensuring that every ATEX-proof gland is tightly sealed to prevent any exposure to the hazardous environment.
- Continuous Monitoring:
- Monitor the camera and flashlight during operation, and periodically check for any irregularities in the video feed or illumination.
Step 7: Shutdown Process
- Power Off the Flashlight:
- When the operation is complete, power off the flashlight by disconnecting its power supply.
- Power Off the Camera:
- Turn off the camera by disconnecting its power supply cable.
- Disconnect RJ45 Cable:
- Carefully disconnect the RJ45 cable from both the camera and the display device, ensuring the glands are handled with care.
Operating an ATEX-proof camera requires careful attention to detail, particularly regarding the secure connection of ATEX-certified glands and cables. By following these steps, you can safely power on and operate your ATEX-proof camera and flashlight, ensuring safe and reliable monitoring in hazardous environments.
Conclusion
In the oil and gas industry, where safety and reliability are non-negotiable, ATEX zones and ATEX-proof equipment play a crucial role. Understanding and implementing ATEX standards for cameras and systems not only ensures compliance with regulations but also significantly enhances safety and operational efficiency. By investing in ATEX-certified equipment, companies can protect their workforce, assets, and the environment while maintaining smooth and safe operations.

You must be logged in to post a comment.