How to Turn On, Turn Off, and Basic Overview of the DJI Pocket 2
The DJI Pocket 2 is a compact yet powerful camera designed for capturing high-quality video and photos with ease. Understanding how to power the device on and off, along with a basic overview of its features, will help you get the most out of your camera. This guide provides detailed instructions on powering the DJI Pocket 2 and a brief overview of its key functions. For a visual demonstration, watch our YouTube video
Turning On the DJI Pocket 2
- Locate the Power Button
- The power button is situated on the side of the DJI Pocket 2, near the USB-C port.
- Power On
- Press and hold the power button for about 1 second. The camera will vibrate, and the screen will light up, indicating that the device is powering on.
- Startup Sequence
- Once powered on, the DJI Pocket 2 will go through a startup sequence. You’ll see the DJI logo and a brief loading screen as the system initializes. The camera is now ready for use.
Turning Off the DJI Pocket 2
- Locate the Power Button
- As with powering on, the power button is on the side of the DJI Pocket 2.
- Power Off
- Press and hold the power button for about 2 seconds. The screen will display a prompt asking if you want to shut down the device.
- Confirm Shutdown
- Follow the on-screen instructions to confirm that you want to power off the camera. The device will vibrate once more, and the screen will turn off, indicating that the camera is shutting down.
Basic Overview of the DJI Pocket 2
- Main Screen
- The main screen displays the live view from the camera, along with essential information such as battery status, current mode, and remaining storage space. Use the touchscreen to navigate menus and settings.
- Gimbal and Lens
- The DJI Pocket 2 features a built-in 3-axis gimbal that stabilizes the camera, ensuring smooth and steady footage. The lens is designed for wide-angle shots, providing a broad field of view for your photos and videos.
- Controls and Ports
- Touchscreen: Navigate through settings, modes, and previews using the responsive touchscreen interface.
- Microphone: Built-in microphones capture audio during video recording. Ensure they are not obstructed for the best sound quality.
- USB-C Port: Used for charging the device, transferring files, and connecting accessories.
- MicroSD Slot: Insert a microSD card to store your photos and videos. Use a high-speed card for optimal performance.
- Modes and Settings
- Photo Mode: Capture high-resolution still images with various settings and shooting modes.
- Video Mode: Record high-quality video in different resolutions and frame rates, including 4K at 60 FPS.
- Gimbal Settings: Adjust gimbal settings to follow subjects, stabilize footage, or create different motion effects.
Conclusion
Turning the DJI Pocket 2 on and off is straightforward, and understanding the basic features and functions will help you get the most out of your device. With its intuitive touchscreen interface, gimbal stabilization, and versatile shooting modes, the DJI Pocket 2 is designed to enhance your content creation experience.
For a comprehensive visual guide on turning the device on and off and a basic overview of its features, don’t forget to watch our YouTube video linked above. This will provide you with a clear understanding of how to operate the DJI Pocket 2 and make the most of its capabilities.
Happy shooting with your DJI Pocket 2!
Mastering the Settings of Your DJI Pocket 2: A Comprehensive Guide
The DJI Pocket 2 is a versatile and powerful compact camera designed to capture high-quality video and photos with ease. To get the most out of your device, understanding and adjusting its settings is crucial. This guide will walk you through the key settings of the DJI Pocket 2 and how to optimize them for your needs. For a visual demonstration, check out our YouTube video linked at the end of this blog.
1. Camera Modes
a. Photo Mode
- Single Shot: Capture a single photo with a press of the shutter button.
- Burst Mode: Take a series of photos in quick succession, ideal for capturing fast-moving subjects or choosing the best shot from several options.
- Timelapse: Create a time-lapse video by capturing photos at set intervals. This mode is perfect for capturing long processes or movements over time.
- Panorama: Take wide-angle photos by automatically stitching multiple shots together, ideal for capturing landscapes or large groups.
b. Video Mode
- Standard Video: Record continuous video at your selected resolution and frame rate.
- Slow Motion: Capture video at a higher frame rate (e.g., 120 FPS or 240 FPS) for smooth slow-motion playback in post-production.
- Time-Lapse Video: Record a video with a time-lapse effect, combining the functionality of the time-lapse photo mode but in video format.
Watch More: For an in-depth look at each camera mode and practical tips on using them, watch our YouTube video linked below.
2. Resolution and Frame Rate Settings
a. Resolution
- 4K (3840 x 2160): Provides the highest video quality and detail. Ideal for professional projects or where high resolution is crucial.
- 2.7K (2720 x 1530): Offers a balance between high resolution and manageable file size. Suitable for most content creation needs.
- 1080p (1920 x 1080): Standard Full HD resolution, widely used and compatible with most devices and platforms.
b. Frame Rate
- 24 FPS: Standard frame rate for a cinematic look. Often used in film production for a traditional film feel.
- 30 FPS: Common for general video recording and online content. Provides smooth motion.
- 60 FPS: Ideal for high-motion content or creating slow-motion effects.
Watch More: Explore the different resolution and frame rate options and their impact on your footage in our detailed YouTube video guide.
3. White Balance
a. Auto White Balance (AWB): Automatically adjusts the color temperature based on the lighting conditions. Suitable for general use but may not always provide the most accurate colors.
b. Manual White Balance: Allows you to set the white balance manually to match specific lighting conditions. Useful for achieving consistent color tones, especially in controlled environments.
Watch More: Learn how to adjust white balance settings for accurate color reproduction in our comprehensive YouTube video.
4. Exposure Settings
a. ISO (International Standards Organization): Controls the camera’s sensitivity to light.
- Low ISO (e.g., 100-400): Best for well-lit environments to minimize noise and maintain image clarity.
- High ISO (e.g., 800-3200): Useful in low-light conditions but may introduce noise or grain in the footage.
b. Shutter Speed: Controls the duration the camera’s shutter is open, affecting motion blur and exposure.
- Standard Speed: Typically, use a shutter speed that is double the frame rate (e.g., 1/60 for 30 FPS) to achieve natural motion blur.
Watch More: For a detailed explanation of how ISO and shutter speed affect your video and photo quality, check out our YouTube video.
5. Stabilization Settings
a. RockSteady: DJI’s electronic image stabilization technology that reduces camera shake and produces smooth footage.
- Enable/Disable: Turn RockSteady on or off depending on whether you need additional stabilization.
b. Follow Mode: Keeps the camera focused on the subject while following its movement, providing smooth tracking shots.
Watch More: Discover how to use stabilization settings to enhance your footage stability in our YouTube video.
6. Storage and File Management
a. SD Card Management: The DJI Pocket 2 uses a microSD card for storing photos and videos. Ensure you use a high-speed card (UHS-I U3 or above) to handle high-resolution video recording.
- Format SD Card: Regularly format the SD card to keep it running efficiently and free of file system errors.
b. File Transfer: Transfer files to your computer or mobile device using a USB-C cable or through the DJI Mimo app for seamless access and sharing.
Watch More: Learn how to manage your storage and transfer files effectively in our YouTube video.
7. Connectivity Settings
a. Wi-Fi and Bluetooth: Connect the DJI Pocket 2 to the DJI Mimo app for additional control options, firmware updates, and enhanced editing features.
- Pairing: Follow the instructions in the DJI Mimo app to connect your Pocket 2 via Wi-Fi or Bluetooth.
b. App Integration: Use the DJI Mimo app to access advanced features, edit footage, and share content directly from your device.
Watch More: For tips on connecting and using the DJI Mimo app with your DJI Pocket 2, check out our YouTube video guide.
Conclusion
Mastering the settings on your DJI Pocket 2 allows you to tailor your shooting experience and capture high-quality footage with precision. By understanding and adjusting camera modes, resolution, frame rates, white balance, exposure, stabilization, storage, and connectivity, you can optimize your content creation process. For a visual walkthrough of these settings and practical tips, be sure to watch our YouTube video linked above.
With the right settings, your DJI Pocket 2 can become a powerful tool for creating stunning and professional-looking content. Happy filming
Must-Have Accessories for DJI Pocket 2
The DJI Pocket 2 is a versatile and compact camera that brings a lot of creative potential to your fingertips. To maximize its capabilities and ensure smooth shooting experiences, investing in the right accessories can make all the difference. Here’s a comprehensive guide to must-have accessories for the DJI Pocket 2, covering everything from mounting solutions to protective cases, including tripods and body mounts for dynamic filming.
1. DJI Pocket 2 Wide-Angle Lens
Why You Need It: The Wide-Angle Lens expands your field of view, allowing you to capture more of your surroundings. This is especially useful for vlogging, travel videos, and landscape shots where a broader perspective enhances the overall visual appeal.
Key Features:
- Increases the camera’s field of view.
- Reduces distortion and maintains image quality.
- Easy to attach and remove.
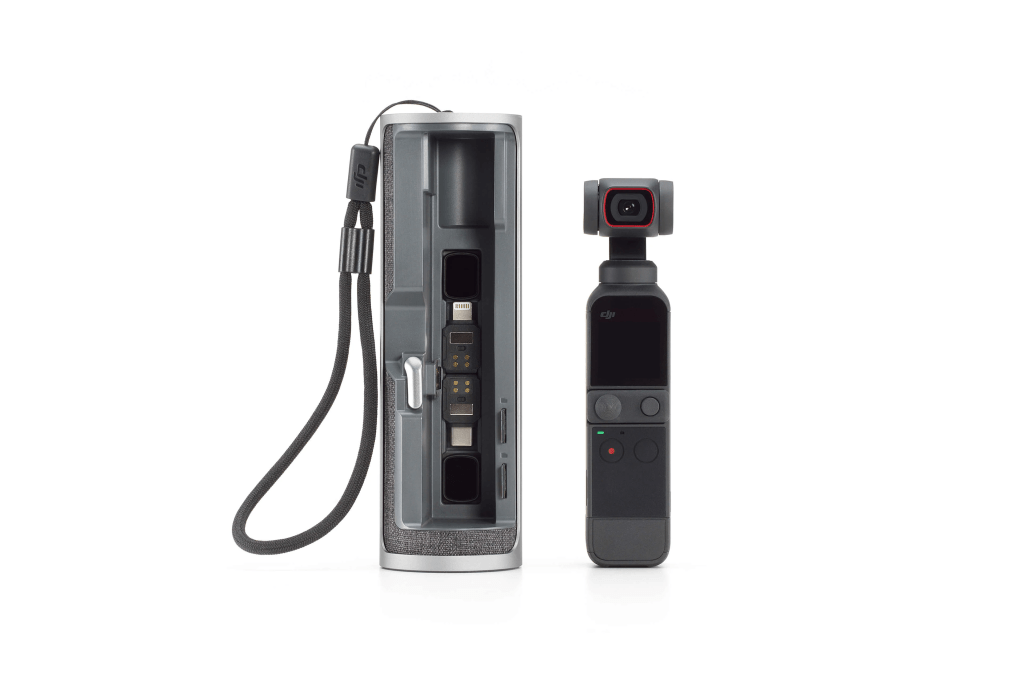
2. Charging Case
Why You Need It: A Charging Case is essential for long shooting days. It not only protects your DJI Pocket 2 but also provides extra battery life. This ensures that you never miss a moment due to a dead battery.
Key Features:
- Integrated battery pack for on-the-go charging.
- Protects the camera from scratches and impacts.
- Compact and portable design.
3. Wireless Microphone
Why You Need It: The built-in microphone of the DJI Pocket 2 might not always deliver the best audio quality, especially in noisy environments. A Wireless Microphone ensures clear and professional audio for interviews, vlogs, and more.
Key Features:
- Clear and crisp audio capture.
- Wireless connectivity for freedom of movement.
- Easy to pair with the DJI Pocket 2.
4. Controller Wheel
Why You Need It: The Controller Wheel allows precise adjustments to camera settings such as tilt and pan. It’s particularly useful for achieving smooth and controlled camera movements.
Key Features:
- Enhanced control over camera angles.
- Smooth operation for cinematic shots.
- Ergonomic design for comfortable handling.
5. Micro Tripod
Why You Need It: A Micro Tripod provides stability for your DJI Pocket 2, helping to reduce camera shake and improve the quality of your shots. It’s perfect for tabletop shots, selfies, or steadying your camera in tricky shooting angles.
Key Features:
- Compact and lightweight.
- Adjustable legs for various shooting positions.
- Easily fits in your bag.
6. DJI Pocket 2 Extension Rod
Why You Need It: The Extension Rod allows you to extend the reach of your DJI Pocket 2, giving you a longer range for selfies and group shots. It also helps in capturing high or low-angle shots without the need for a bulky tripod.
Key Features:
- Adjustable length for versatile shooting.
- Ergonomic handle for comfortable use.
- Built-in control buttons for convenience.
7. Protective Case
Why You Need It: A Protective Case shields your DJI Pocket 2 from dust, scratches, and accidental drops. It’s an essential accessory for keeping your camera in pristine condition during travel and everyday use.
Key Features:
- Durable materials for robust protection.
- Custom-fit design for the DJI Pocket 2.
- Easy access to all ports and controls.
8. Carrying Pouch
Why You Need It: A Carrying Pouch offers a convenient way to transport your DJI Pocket 2 and its accessories. It keeps everything organized and protected while on the move.
Key Features:
- Soft interior lining to prevent scratches.
- Multiple compartments for accessories.
- Compact and travel-friendly design.
9. Lens Cleaning Kit
Why You Need It: To maintain the clarity of your shots, it’s important to keep the lens clean. A Lens Cleaning Kit includes tools to gently clean the lens and remove smudges or dust.
Key Features:
- Includes cleaning cloth, brush, and solution.
- Safe for delicate lenses.
- Essential for maintaining optimal image quality.
10. ND Filters
Why You Need It: ND (Neutral Density) Filters help manage exposure by reducing the amount of light entering the camera. This is particularly useful for creating smooth, cinematic motion effects in bright conditions.
Key Features:
- Reduces light exposure to avoid overexposed footage.
- Enhances video quality with smooth motion.
- Easy to attach and remove.
11. Tripods
Why You Need It: A tripod is crucial for stabilizing your shots, ensuring that your footage remains steady and clear. There are several types of tripods to consider:
- Flexible Tripod: Features adjustable legs that can wrap around objects or bend to support the camera in various angles. Ideal for outdoor and unconventional shooting locations.
- Tabletop Tripod: Small and sturdy, perfect for stable shots on flat surfaces like tables or desks.
- Mini Tripod with Extendable Legs: Offers additional height and flexibility, combining the benefits of a tripod with the portability of a compact design.
Key Features:
- Provides stability to reduce camera shake.
- Adjustable height and angles for versatile shooting.
- Compact and portable options available.
12. Body Mounts
Why You Need It: Body mounts allow you to attach your DJI Pocket 2 directly to your body, freeing up your hands while capturing dynamic, immersive footage. These are particularly useful for action shots, point-of-view filming, or capturing hands-free content.
- Chest Mount: Attaches to your chest, providing a stable, first-person perspective. Ideal for activities like hiking or biking.
- Head Mount: Secures the camera to your head, offering a hands-free view that mimics the natural line of sight. Great for POV shots and immersive video experiences.
- Shoulder Mount: Allows the camera to be positioned on your shoulder, providing a steady shot while keeping your hands free for other tasks.
Key Features:
- Hands-free operation for dynamic filming.
- Adjustable straps for comfort and secure fit.
- Allows for unique, immersive perspectives.
Conclusion
Enhancing your DJI Pocket 2 with these accessories can significantly boost your content creation experience. From improving video and audio quality to ensuring your camera stays protected and functional, the right accessories will help you capture stunning footage effortlessly. Whether you need stability with tripods, dynamic angles with body mounts, or protection with cases, investing in these must-have accessories will help you unlock the full potential of your DJI Pocket 2 and take your creative projects to new heights.
UndersUnderstanding Video Resolutions and Frame Rates for DJI Pocket 2: A Comprehensive Guidetanding Video Resolutions: 4K, 2K, and 1K on the DJI Pocket 2
The DJI Pocket 2 is a compact powerhouse when it comes to capturing high-quality video content. Whether you’re a vlogger, filmmaker, or casual content creator, understanding video resolutions and frame rates can significantly impact the quality of your footage. Here’s a detailed breakdown of the video resolutions and frame rates available on the DJI Pocket 2, and how each can enhance your video production.
1. 4K Video Resolution
Overview: 4K resolution, also known as Ultra High Definition (UHD), provides a resolution of 3840 x 2160 pixels. This high level of detail is ideal for producing crisp, clear footage with incredible sharpness and depth.
Benefits:
- Exceptional Detail: Captures fine details and textures, making it ideal for high-quality content such as professional vlogs and cinematic films.
- Future-Proof: As more devices and platforms support 4K, creating content in this resolution ensures longevity and adaptability.
- Enhanced Editing Flexibility: Higher resolution footage allows for more flexibility in post-production, such as cropping or zooming without significant loss of quality.
When to Use It:
- When you need the highest possible image quality.
- For projects where the detail is crucial, such as nature documentaries or professional video shoots.
Watch More: For a visual demonstration of 4K recording and its benefits, check out our YouTube video on the DJI Pocket 2’s 4K capabilities.
2. 2K Video Resolution
Overview: 2K resolution provides a resolution of 2560 x 1440 pixels. While not as high as 4K, 2K still offers a significant upgrade over Full HD and provides excellent video quality with a good balance between detail and file size.
Benefits:
- Balanced Quality: Provides high-quality video while keeping file sizes more manageable compared to 4K.
- Improved Performance: Requires less processing power than 4K, making it easier to edit and render.
- Sufficient for Many Applications: Ideal for streaming and content that doesn’t require the highest resolution, such as web videos and social media posts.
When to Use It:
- For content where 4K is not necessary but you still want better quality than Full HD.
- When you need a good balance between quality and file size.
Watch More: Explore the benefits of shooting in 2K with our detailed YouTube video guide.
3. 1080p (Full HD) Resolution
Overview: Full HD (1080p) resolution provides a resolution of 1920 x 1080 pixels. It’s a standard resolution for many types of video content and is widely supported across devices and platforms.
Benefits:
- High Quality: Delivers clear and detailed video suitable for most viewing scenarios.
- Compatibility: Works well across a wide range of devices, including smartphones, tablets, and laptops.
- Efficient File Size: Provides good video quality without the large file sizes associated with 4K.
When to Use It:
- For everyday content creation where 4K is not required.
- When uploading videos to platforms that support 1080p, ensuring broad compatibility.
Watch More: Learn more about shooting in 1080p with our dedicated YouTube video on the DJI Pocket 2’s Full HD features.
Frame Rates (FPS) Explained
1. 24 FPS (Frames Per Second)
Overview: 24 FPS is the standard frame rate for cinematic films. It provides a traditional film look and is often used to achieve a more dramatic, cinematic feel.
Benefits:
- Cinematic Look: Mimics the appearance of traditional films and is preferred for storytelling.
- Less Data: Requires less data compared to higher frame rates, resulting in smaller file sizes.
When to Use It:
- For creating content with a cinematic style or narrative.
Watch More: Check out our YouTube video to see how 24 FPS affects the look of your footage.
2. 30 FPS
Overview: 30 FPS is a standard frame rate for television and online videos. It provides smooth motion and is commonly used for general content creation.
Benefits:
- Smooth Motion: Offers a good balance between fluidity and data usage.
- Versatile Use: Ideal for a wide range of applications, from vlogs to tutorials.
When to Use It:
- For most video content where smooth motion is desired without requiring the higher frame rates.
Watch More: Discover how 30 FPS compares with other frame rates in our YouTube video guide.
3. 60 FPS
Overview: 60 FPS is often used for high-motion content, such as sports or action shots. It provides exceptionally smooth motion and can also be used to create slow-motion effects in post-production.
Benefits:
- Smooth Motion: Ideal for capturing fast-moving subjects with clarity.
- Slow Motion: Allows for smooth slow-motion effects when editing.
When to Use It:
- For action-packed videos, sports, or when you plan to use slow-motion effects.
Watch More: Explore the benefits of shooting at 60 FPS with our detailed YouTube video.
Conclusion
Understanding the video resolutions and frame rates available on the DJI Pocket 2 helps you choose the best settings for your content creation needs. Whether you’re capturing stunning 4K footage or using 60 FPS for smooth action shots, each option offers unique advantages that can enhance your videos. For a more in-depth look at these settings and their practical applications, don’t forget to watch our YouTube videos linked above.
By selecting the right resolution and frame rate, you can ensure your content stands out with the clarity and fluidity you desire. Happy shooting!
How to Connect Your DJI Pocket 2 to a Laptop: A Step-by-Step Guide
Connecting your DJI Pocket 2 to a laptop can be useful for transferring files or updating firmware. This guide will walk you through the process of connecting your DJI Pocket 2 to a laptop, including the necessary steps and tips for a smooth connection. For a visual demonstration, check out our YouTube video linked at the end of this blog.
1. Required Equipment
Before starting, ensure you have the following items:
- DJI Pocket 2
- USB-C to USB-A Cable (included with the Pocket 2)
- Laptop with a USB port
2. Connecting the DJI Pocket 2 to Your Laptop
a. Power On the Pocket 2
- Turn On the Camera: Press and hold the power button on the DJI Pocket 2 until the device powers on. Ensure the battery is sufficiently charged.
b. Connect the USB-C Cable
- Locate the USB-C Port: On the DJI Pocket 2, find the USB-C port, which is used for charging and data transfer.
- Plug in the Cable: Connect the USB-C end of the cable to the DJI Pocket 2. Connect the other end (USB-A) to an available USB port on your laptop.
c. Accessing Files
- Automatic Detection: Once connected, your laptop should automatically detect the DJI Pocket 2 as an external storage device. You may see a prompt or notification indicating that new hardware has been detected.
- Open File Explorer (Windows) or Finder (Mac): Navigate to the file management application on your laptop.
- Windows: Open File Explorer and look for a new drive labeled “DJI Pocket 2” or similar.
- Mac: Open Finder and look for the DJI Pocket 2 under the “Locations” section.
d. Transferring Files
- Browse Folders: Access the internal storage of the DJI Pocket 2, where you will find folders containing your photos and videos.
- Copy Files: Select the files you want to transfer, then drag and drop them to a desired location on your laptop or use the copy-paste function.
e. Disconnecting Safely
- Eject the Device: Before unplugging the DJI Pocket 2, safely eject it from your laptop.
- Windows: Right-click on the drive icon in File Explorer and select “Eject.”
- Mac: Right-click on the drive icon in Finder and select “Eject.”
- Unplug the Cable: Once the device is safely ejected, disconnect the USB-C cable from both the DJI Pocket 2 and the laptop.
Watch More: For a visual walkthrough of connecting and transferring files from your DJI Pocket 2 to a laptop, watch our detailed YouTube video guide linked below.
3. Firmware Updates
a. Using the DJI Mimo App
- Download DJI Mimo App: Ensure you have the DJI Mimo app installed on your mobile device. The app is necessary for firmware updates.
- Connect and Update: Connect your DJI Pocket 2 to your mobile device using the appropriate cable, launch the DJI Mimo app, and follow the instructions to check for and install any available firmware updates.
Watch More: For a complete guide on updating firmware using the DJI Mimo app and connecting your DJI Pocket 2 to a laptop, refer to our YouTube video for step-by-step instructions.
Conclusion
Connecting your DJI Pocket 2 to a laptop is a straightforward process that allows you to transfer files and keep your device updated. By following these steps, you can efficiently manage your content and ensure your camera is running the latest firmware. For additional tips and visual guidance, be sure to check out our YouTube video linked above.
With these instructions, you can make the most of your DJI Pocket 2 and streamline your workflow, whether you’re transferring media or performing updates.
Understanding Aspect Ratios for DJI Pocket 2: A Detailed Guide
Aspect ratio is a crucial element in video production that influences how your footage is framed and presented. For content creators using the DJI Pocket 2, understanding aspect ratios helps in delivering videos that look professional and fit the intended platforms. Here’s an in-depth look at aspect ratios, how they affect your videos, and practical tips for using them with the DJI Pocket 2.
What is Aspect Ratio?
Aspect Ratio refers to the proportional relationship between the width and height of a video frame. It is usually expressed as two numbers separated by a colon (e.g., 16:9). The aspect ratio determines how the image is displayed on various screens and can significantly affect the visual composition of your video.
Aspect Ratios Available on DJI Pocket 2
1. 16:9 Aspect Ratio
Overview: The 16:9 aspect ratio is the most common format for modern widescreen displays, including TVs, computer monitors, and most online video platforms. It provides a wide field of view and is ideal for creating videos that are intended for playback on widescreen devices.
Benefits:
- Standard for Most Platforms: Widely used and supported across various devices and platforms, including YouTube and Vimeo.
- Cinematic Look: Offers a wide and immersive viewing experience, suitable for movies and high-definition content.
- Versatile: Works well for both landscape and portrait-oriented shots, making it a flexible choice for various types of videos.
When to Use It:
- For content intended for widescreen displays or online platforms.
- To achieve a cinematic look in your videos.
Watch More: To see how the 16:9 aspect ratio affects your footage and for tips on shooting in this format, check out our detailed YouTube video guide.
2. 4:3 Aspect Ratio
Overview: The 4:3 aspect ratio is a more traditional format that was commonly used in older televisions and monitors. It provides a more square-like frame, offering a different visual perspective compared to widescreen formats.
Benefits:
- Classic Look: Provides a nostalgic or retro feel, reminiscent of older media formats.
- Ideal for Portrait Shots: Can be useful for capturing subjects in a more upright or portrait-oriented composition.
- Space Efficiency: Allows for a more compact frame, which can be advantageous for certain types of content.
When to Use It:
- When you want a classic or retro look.
- For capturing videos where a more square frame is beneficial.
Watch More: Explore the unique characteristics of the 4:3 aspect ratio and how to use it effectively in our YouTube video.
3. 1:1 Aspect Ratio
Overview: The 1:1 aspect ratio is a square format that is particularly popular on social media platforms like Instagram, where square videos and images are commonly used.
Benefits:
- Social Media Friendly: Perfect for platforms that favor square content, ensuring your videos look great on feeds and profiles.
- Balanced Composition: Offers a symmetrical and balanced framing, which can be aesthetically pleasing for certain types of content.
- Consistency: Helps maintain uniformity in your video content across different social media platforms.
When to Use It:
- For videos specifically intended for social media platforms that support square content.
- When you want a balanced and symmetrical look.
Watch More: Learn how to create engaging content using the 1:1 aspect ratio with our YouTube video, which offers practical tips and examples.
Choosing the Right Aspect Ratio for Your Project
Selecting the right aspect ratio depends on the platform you’re targeting and the visual style you aim to achieve. Here are some general guidelines:
- For YouTube and Vimeo: Stick with 16:9 to ensure compatibility and provide a widescreen experience.
- For Instagram and Social Media: Use 1:1 for posts or 9:16 for stories to fit the platform’s requirements.
- For a Classic or Retro Look: Experiment with the 4:3 aspect ratio for a different visual style.
Conclusion
Understanding and choosing the appropriate aspect ratio is essential for delivering videos that look professional and fit the intended viewing platforms. The DJI Pocket 2 provides flexibility in aspect ratios, allowing you to tailor your content to meet specific needs and preferences. For more detailed insights and practical demonstrations on aspect ratios and how they affect your footage, be sure to watch our YouTube videos linked above.
By mastering aspect ratios, you can enhance the visual appeal of your content and ensure it stands out across various platforms. Happy filming!
How to Charge and Care for Your DJI Pocket 2: A Comprehensive Guide
Proper charging and maintenance are essential for ensuring your DJI Pocket 2 remains in excellent working condition and delivers optimal performance. Here’s a detailed guide on how to charge your DJI Pocket 2, along with precautions to keep it safe and functional. For a visual demonstration, check out our YouTube video linked at the end of this blog.
How to Charge Your DJI Pocket 2
1. Using the Charging Cable
- Connect the USB-C Cable: The DJI Pocket 2 uses a USB-C port for charging. Connect the included USB-C cable to the camera’s charging port, which is located on the side of the device.
- Plug into a Power Source: Connect the other end of the USB-C cable to a compatible power source. This can be a USB wall adapter, a computer’s USB port, or a power bank.
- Check Charging Status: The Pocket 2’s LED indicator will show the charging status. When charging, the LED light will blink slowly. Once fully charged, the LED will remain solid.
2. Using the Charging Case
- Insert the DJI Pocket 2: Place your DJI Pocket 2 into the charging case. Make sure it is securely connected to the case’s internal charging connectors.
- Close the Case: Securely close the charging case. This will protect the camera while it charges.
- Connect the Charging Cable: Use the USB-C cable to connect the charging case to a power source.
- Monitor Charging: The charging case will indicate its own charging status, and the Pocket 2 will charge inside the case.
3. Charging Time
- Standard Charging: It generally takes about 73 minutes to fully charge the DJI Pocket 2 from 0% to 100% using a standard 5V/2A charger.
- Charging with the Case: Charging times may vary when using the charging case depending on the remaining battery level and power source.
Watch More: For a step-by-step visual guide on charging your DJI Pocket 2 and using the charging case effectively, watch our YouTube video linked below.
Precautions for Charging and Maintaining Your DJI Pocket 2
1. Use Official Accessories
- Avoid Third-Party Chargers: Always use the official DJI charging cable and power adapters. Third-party chargers may not provide the correct voltage and could potentially damage your device or affect battery performance.
2. Avoid Overcharging
- Disconnect When Fully Charged: Once the battery reaches 100%, disconnect it from the power source to avoid overcharging. Although modern batteries are designed to handle overcharging to some extent, it’s best to unplug when fully charged.
3. Charge in a Safe Environment
- Avoid Extreme Temperatures: Charge your DJI Pocket 2 in a room temperature environment. Charging in extremely hot or cold conditions can affect battery performance and longevity.
- Dry Conditions: Ensure the charging area is dry and free from moisture. Water and electronic components do not mix well.
4. Regular Maintenance
- Clean the Charging Port: Keep the USB-C port clean and free from debris to ensure a proper connection. Use a dry, soft brush or compressed air to remove any dust or lint.
- Store Properly: When not in use, store your DJI Pocket 2 in a cool, dry place. Avoid exposing it to direct sunlight or extreme temperatures.
5. Battery Health
- Avoid Deep Discharges: Try to keep the battery level between 20% and 80% for optimal battery health. Deeply discharging the battery to 0% frequently can reduce its overall lifespan.
- Use Regularly: Regular use of the DJI Pocket 2 helps maintain battery health. If you’re not using it for extended periods, charge it every few months to keep the battery from deteriorating.
6. Safety First
- Avoid Physical Damage: Handle your DJI Pocket 2 with care to prevent physical damage. Avoid dropping or bumping the device, especially while it’s charging.
- Check for Updates: Regularly check for firmware updates to ensure your DJI Pocket 2 is running the latest software, which can include improvements related to battery performance and safety.
Watch More: For additional tips on maintaining and safely charging your DJI Pocket 2, including troubleshooting common issues, watch our detailed YouTube video guide.
Conclusion
Charging and caring for your DJI Pocket 2 properly is essential for maintaining its performance and extending its lifespan. By following these guidelines and precautions, you can ensure your camera remains in top condition and ready to capture stunning footage whenever you need it. For a visual demonstration of these tips and more, be sure to check out our YouTube video linked above.
By adhering to these practices, you’ll keep your DJI Pocket 2 functioning optimally and enjoy reliable performance for all your creative projects. Happy shooting!
Essential Precautions for Your DJI Pocket 2: Keeping Your Camera Safe and Functional
The DJI Pocket 2 is a powerful and compact camera designed to capture high-quality videos and photos. To ensure that your device remains in top condition and performs optimally, it’s important to follow specific precautions. This guide provides detailed tips on how to handle, store, and maintain your DJI Pocket 2 to avoid common issues and extend its lifespan. For a visual demonstration, check out our YouTube video linked at the end of this blog.
1. Handling and Usage
a. Avoid Physical Damage
- Handle with Care: Always handle your DJI Pocket 2 with clean, dry hands to prevent scratches and damage. Avoid dropping or bumping the camera, especially when it’s powered on or recording.
- Use a Strap: Utilize the included wrist strap or a compatible accessory to prevent accidental drops while filming or taking photos.
b. Avoid Exposure to Moisture
- Keep Dry: The DJI Pocket 2 is not waterproof. Avoid exposing it to rain, splashes, or high humidity environments. Moisture can damage internal components and affect performance.
- Wipe Dry: If the camera does get wet, gently wipe it dry with a soft, lint-free cloth. Ensure the device is completely dry before powering it on or charging it.
Watch More: For tips on handling and protecting your DJI Pocket 2, watch our YouTube video for practical advice and visual demonstrations.
2. Charging Precautions
a. Use Official Accessories
- Use DJI Cables and Adapters: Always use the official DJI USB-C cable and power adapters for charging. Third-party chargers may not provide the correct voltage, potentially damaging the battery or device.
- Avoid Overcharging: Disconnect the camera from the power source once it reaches 100% charge to avoid overcharging, which can affect battery health over time.
b. Charge in Safe Conditions
- Temperature Control: Charge your DJI Pocket 2 in a temperature-controlled environment. Avoid charging in extreme temperatures, as high heat or cold can damage the battery.
- Dry Environment: Ensure that the charging area is dry and free from moisture to prevent electrical issues.
Watch More: Check out our YouTube video for detailed instructions on safe charging practices and how to use the charging case effectively.
3. Storage and Maintenance
a. Store Properly
- Use a Protective Case: When not in use, store your DJI Pocket 2 in a protective case or pouch to prevent physical damage and dust accumulation. This also helps in protecting the camera’s lens and gimbal.
- Avoid Direct Sunlight: Store the camera in a cool, dry place away from direct sunlight and extreme temperatures to prevent damage to the internal components.
b. Clean Regularly
- Lens Care: Use a lens cleaning brush or microfiber cloth to gently clean the lens. Avoid using liquids or abrasive materials that could scratch the lens surface.
- Port Maintenance: Keep the USB-C port and other connectors clean. Use a dry brush or compressed air to remove any dust or debris that may accumulate.
Watch More: For tips on proper storage and maintenance to keep your DJI Pocket 2 in top shape, watch our detailed YouTube video.
4. Firmware and Software
a. Keep Firmware Updated
- Regular Updates: Check for and install the latest firmware updates via the DJI Mimo app. Firmware updates often include performance improvements, bug fixes, and new features that enhance your camera’s functionality.
- Follow Instructions: Follow the update instructions carefully to avoid potential issues during the update process.
b. Use Compatible Apps
- DJI Mimo App: Use the DJI Mimo app for enhanced control, editing, and sharing of your content. Ensure that the app is updated to the latest version for optimal performance.
Watch More: Learn how to update firmware and use the DJI Mimo app effectively by watching our YouTube video guide.
5. Battery Care
a. Avoid Deep Discharge
- Maintain Battery Health: Try to keep the battery level between 20% and 80% to extend its lifespan. Avoid letting the battery completely discharge frequently, as it can reduce battery performance over time.
b. Store Battery Properly
- Partial Charge Storage: If storing the camera for an extended period, keep the battery at around 50% charge. This helps in maintaining battery health and ensuring it’s ready for use when needed.
Watch More: For additional battery care tips and how to manage battery health, check out our YouTube video.
6. Safety Measures
a. Avoid Unauthorized Repairs
- Professional Servicing: If your DJI Pocket 2 encounters any issues or requires repairs, contact authorized DJI service centers. Attempting repairs yourself or using unauthorized services may void the warranty or cause further damage.
b. Monitor for Issues
- Check for Malfunctions: Regularly monitor the camera for any signs of malfunction, such as unusual noises, overheating, or connectivity issues. Address any problems promptly to avoid further damage.
Watch More: For guidance on troubleshooting common issues and ensuring safety, watch our comprehensive YouTube video.
Conclusion
By following these precautions, you can ensure that your DJI Pocket 2 remains in excellent working condition and continues to deliver high-quality footage and photos. Proper handling, charging, storage, and maintenance are key to extending the lifespan of your camera and ensuring it performs optimally. For visual demonstrations and additional tips, be sure to watch our YouTube video linked above.
Taking care of your DJI Pocket 2 will help you make the most of its features and keep it ready for all your creative projects. Happy filming!
Is the DJI Pocket 2 Worth Buying for Photographers? A Detailed Analysis
The DJI Pocket 2 is a compact and versatile camera designed to offer high-quality video and photo capabilities in a portable package. As a photographer, deciding whether to invest in the DJI Pocket 2 depends on your specific needs and preferences. In this guide, we’ll explore the benefits and drawbacks of the DJI Pocket 2 to help you determine if it’s a worthwhile addition to your gear. For a visual overview, check out our YouTube video linked at the end of this blog.
Is the DJI Pocket 2 Worth Buying for Photographers?
Yes, if you are looking for a compact, high-quality camera with stabilization and ease of use. Here’s a detailed breakdown of the benefits and cons:
Benefits of the DJI Pocket 2
1. Compact and Portable
- Convenience: The DJI Pocket 2’s small size makes it incredibly portable. It fits easily into pockets or small bags, making it a great choice for photographers who need a lightweight, on-the-go camera.
- Discreet Shooting: Its compact form factor allows for more discreet photography, which can be advantageous in capturing candid moments without drawing attention.
2. High-Quality Video and Photos
- 4K Video: The Pocket 2 supports 4K video recording at up to 60 FPS, providing high-resolution footage with excellent detail and clarity.
- 64MP Photos: The 64-megapixel sensor delivers sharp and detailed images, suitable for various photography needs, from landscape to portrait shots.
3. Advanced Stabilization
- RockSteady Stabilization: The Pocket 2 features RockSteady electronic image stabilization, which significantly reduces camera shake and produces smooth, professional-looking videos.
- Motion Tracking: The gimbal helps maintain stability while tracking moving subjects, enhancing video quality and reducing the need for post-production stabilization.
4. Versatile Shooting Modes
- Various Modes: The DJI Pocket 2 offers multiple shooting modes, including panorama, time-lapse, and slow-motion, providing creative flexibility for different types of photography.
- Easy-to-Use Interface: The intuitive touchscreen interface and built-in controls make it easy to switch between modes and adjust settings on the fly.
5. Integration with DJI Mimo App
- Enhanced Features: The DJI Mimo app offers additional features like editing tools, live streaming, and advanced settings control, enhancing the overall shooting experience.
- Convenient Sharing: Directly upload and share your content from the app, simplifying the process of getting your work online quickly.
Watch More: For a closer look at the benefits and how the DJI Pocket 2 can fit into your photography workflow, watch our YouTube video linked below.
Cons of the DJI Pocket 2
1. Limited Manual Controls
- Basic Adjustments: While the Pocket 2 offers various shooting modes, it lacks extensive manual control options compared to dedicated DSLR or mirrorless cameras. This can be a drawback for photographers who prefer full control over settings like aperture, shutter speed, and ISO.
- Advanced Features: Professional photographers might find the manual controls insufficient for highly specialized or technical shots.
2. Battery Life
- Shorter Duration: The battery life of the DJI Pocket 2 is relatively short, especially when recording high-resolution video. You may need to carry spare batteries or a power bank for extended shooting sessions.
- Charging Time: The charging time can also be a consideration if you have tight shooting schedules and limited access to charging facilities.
3. Limited Accessory Support
- Accessory Options: While there are some accessories available, such as mounts and cases, the range of compatible accessories is not as extensive as those for larger cameras. This might limit the customization and expansion of your setup.
- Third-Party Accessories: Compatibility with third-party accessories may vary, and you might need to rely on specific DJI products for optimal performance.
4. No Optical Zoom
- Fixed Lens: The DJI Pocket 2 features a fixed lens with a wide-angle view, which means it lacks optical zoom capabilities. This can be limiting for photographers who need zoom functionality for various types of shots.
- Digital Zoom: Although digital zoom is available, it may not provide the same quality as optical zoom and can result in reduced image clarity.
Watch More: For a visual review of the drawbacks and limitations of the DJI Pocket 2, watch our YouTube video guide.
Conclusion
The DJI Pocket 2 offers several compelling benefits for photographers, including its compact size, high-quality video and photo capabilities, advanced stabilization, and versatility in shooting modes. However, it does have some limitations, such as limited manual controls, shorter battery life, and a lack of optical zoom.
If you’re looking for a portable, easy-to-use camera with excellent stabilization for casual or travel photography, the DJI Pocket 2 could be a valuable addition to your gear. However, if you require extensive manual controls, long battery life, or optical zoom, you might want to consider these factors before making a purchase.
For a complete overview and more detailed insights, including real-world applications and comparisons, check out our YouTube video linked above.
By weighing the benefits and cons, you can make an informed decision on whether the DJI Pocket 2 is the right choice for your photography needs.
Exploring the Zoom Functionality of the DJI Osmo Pocket 2 📸✨
In my latest video, I dive into the zoom capabilities of the DJI Osmo Pocket 2, putting its performance to the test across various scenes. From capturing distant landscapes to close-up details, this pocket-sized gimbal camera delivers impressive results!
Video Highlights:
In the video, I explore the zoom in and out functionality using different settings to showcase how the DJI Osmo Pocket 2 handles various scenarios:
- Zooming Out on Trees:
I begin by zooming out to reveal a wide view of the trees. For this shot, I used the standard zoom setting, which allowed for a smooth transition from a close-up view to a broad landscape. The camera’s stability ensures that the zoom is fluid and visually pleasing. - Close-Up of a Snail:
Next, I zoom in to capture the fine details of a snail. Using the camera’s macro mode, I focused on the intricate patterns and textures of the snail’s shell. The clarity and sharpness at this close range are impressive, demonstrating the camera’s ability to handle detailed shots. - Texturing Leaves and Moss:
I then experimented with zooming in and out on a leaf and moss, highlighting their textures. Adjusting the zoom settings allowed me to capture the fine details and the vibrant colors, showing the camera’s versatility in handling different textures and close-up subjects. - Creative Leg Zoom:
For a fun twist, I used the zoom function creatively on my leg. This playful approach showcases the smoothness of the zoom transitions and how it can be used for dynamic and engaging shots. - Smooth Sky Shot:
Finally, I zoomed in on the sky and clouds. The smooth zoom-in captured the serene beauty of the sky, with the colors and details remaining vivid and sharp throughout the transition.
Settings & Techniques Used:
- Zoom Settings: I utilized both the standard and macro zoom modes to demonstrate the camera’s flexibility. The standard zoom was perfect for wide shots and general zooming, while the macro mode excelled in capturing fine details up close.
- Stabilization: The DJI Osmo Pocket 2’s built-in stabilization helped ensure that all zoom transitions were smooth and free from noticeable shaking.
- Focus Adjustment: For close-up shots, I manually adjusted the focus to ensure that the details were crisp and clear.
Watch the full video to see these zoom tests in action and get a better understanding of how the DJI Osmo Pocket 2 performs in different situations. Don’t forget to like, comment, and subscribe for more tips and tricks on making the most of your DJI Osmo Pocket 2! 🎥✨
Feel free to adjust or add more specifics based on your video’s content and your personal style!
